
Going out into nature and setting up a station sounds like fun . . . but how do you actually do that? The first thing is figuring out a power plan; if you can’t power your gear reliably then nothing else matters.

Define your needs
When looking around at power systems it is easy to get overwhelmed. The market is filled with high-performance, high-price, super lightweight gear. But the latest and greatest is not always the best fit for your needs. Sometimes you just need something simple, reliable, and easy to maintain.
My intended use was events like Parks on the Air activations, or perhaps ARRL Field Day. So how did that influence the design?
- Most of these activations take place close to a vehicle, so I didn’t need something ultralight. I could use lead-acid batteries and save money.
- I needed to be able to recharge the batteries in the field . . . in Alaska . . . even in winter. Solar isn’t a realistic option in the winter, which means the system must be chargeable from a running vehicle.
- The packs have to be water resistant in case they get rained on.
- I need at least two power pole connections per pack.
- The system has to have a fuse in case something shorts out. (Setting campsites on fire is generally frowned upon.)
Details
With the needs identified it was time to put designs to paper. Since the design didn’t have to be lightweight I was able to use some sealed lead acid batteries that I already had. That took care of the batteries.
Container
The next step was to find a container and figure out the wiring. The container and wiring are what makes the batteries portable, provides protection, and enables easy connections to gear.
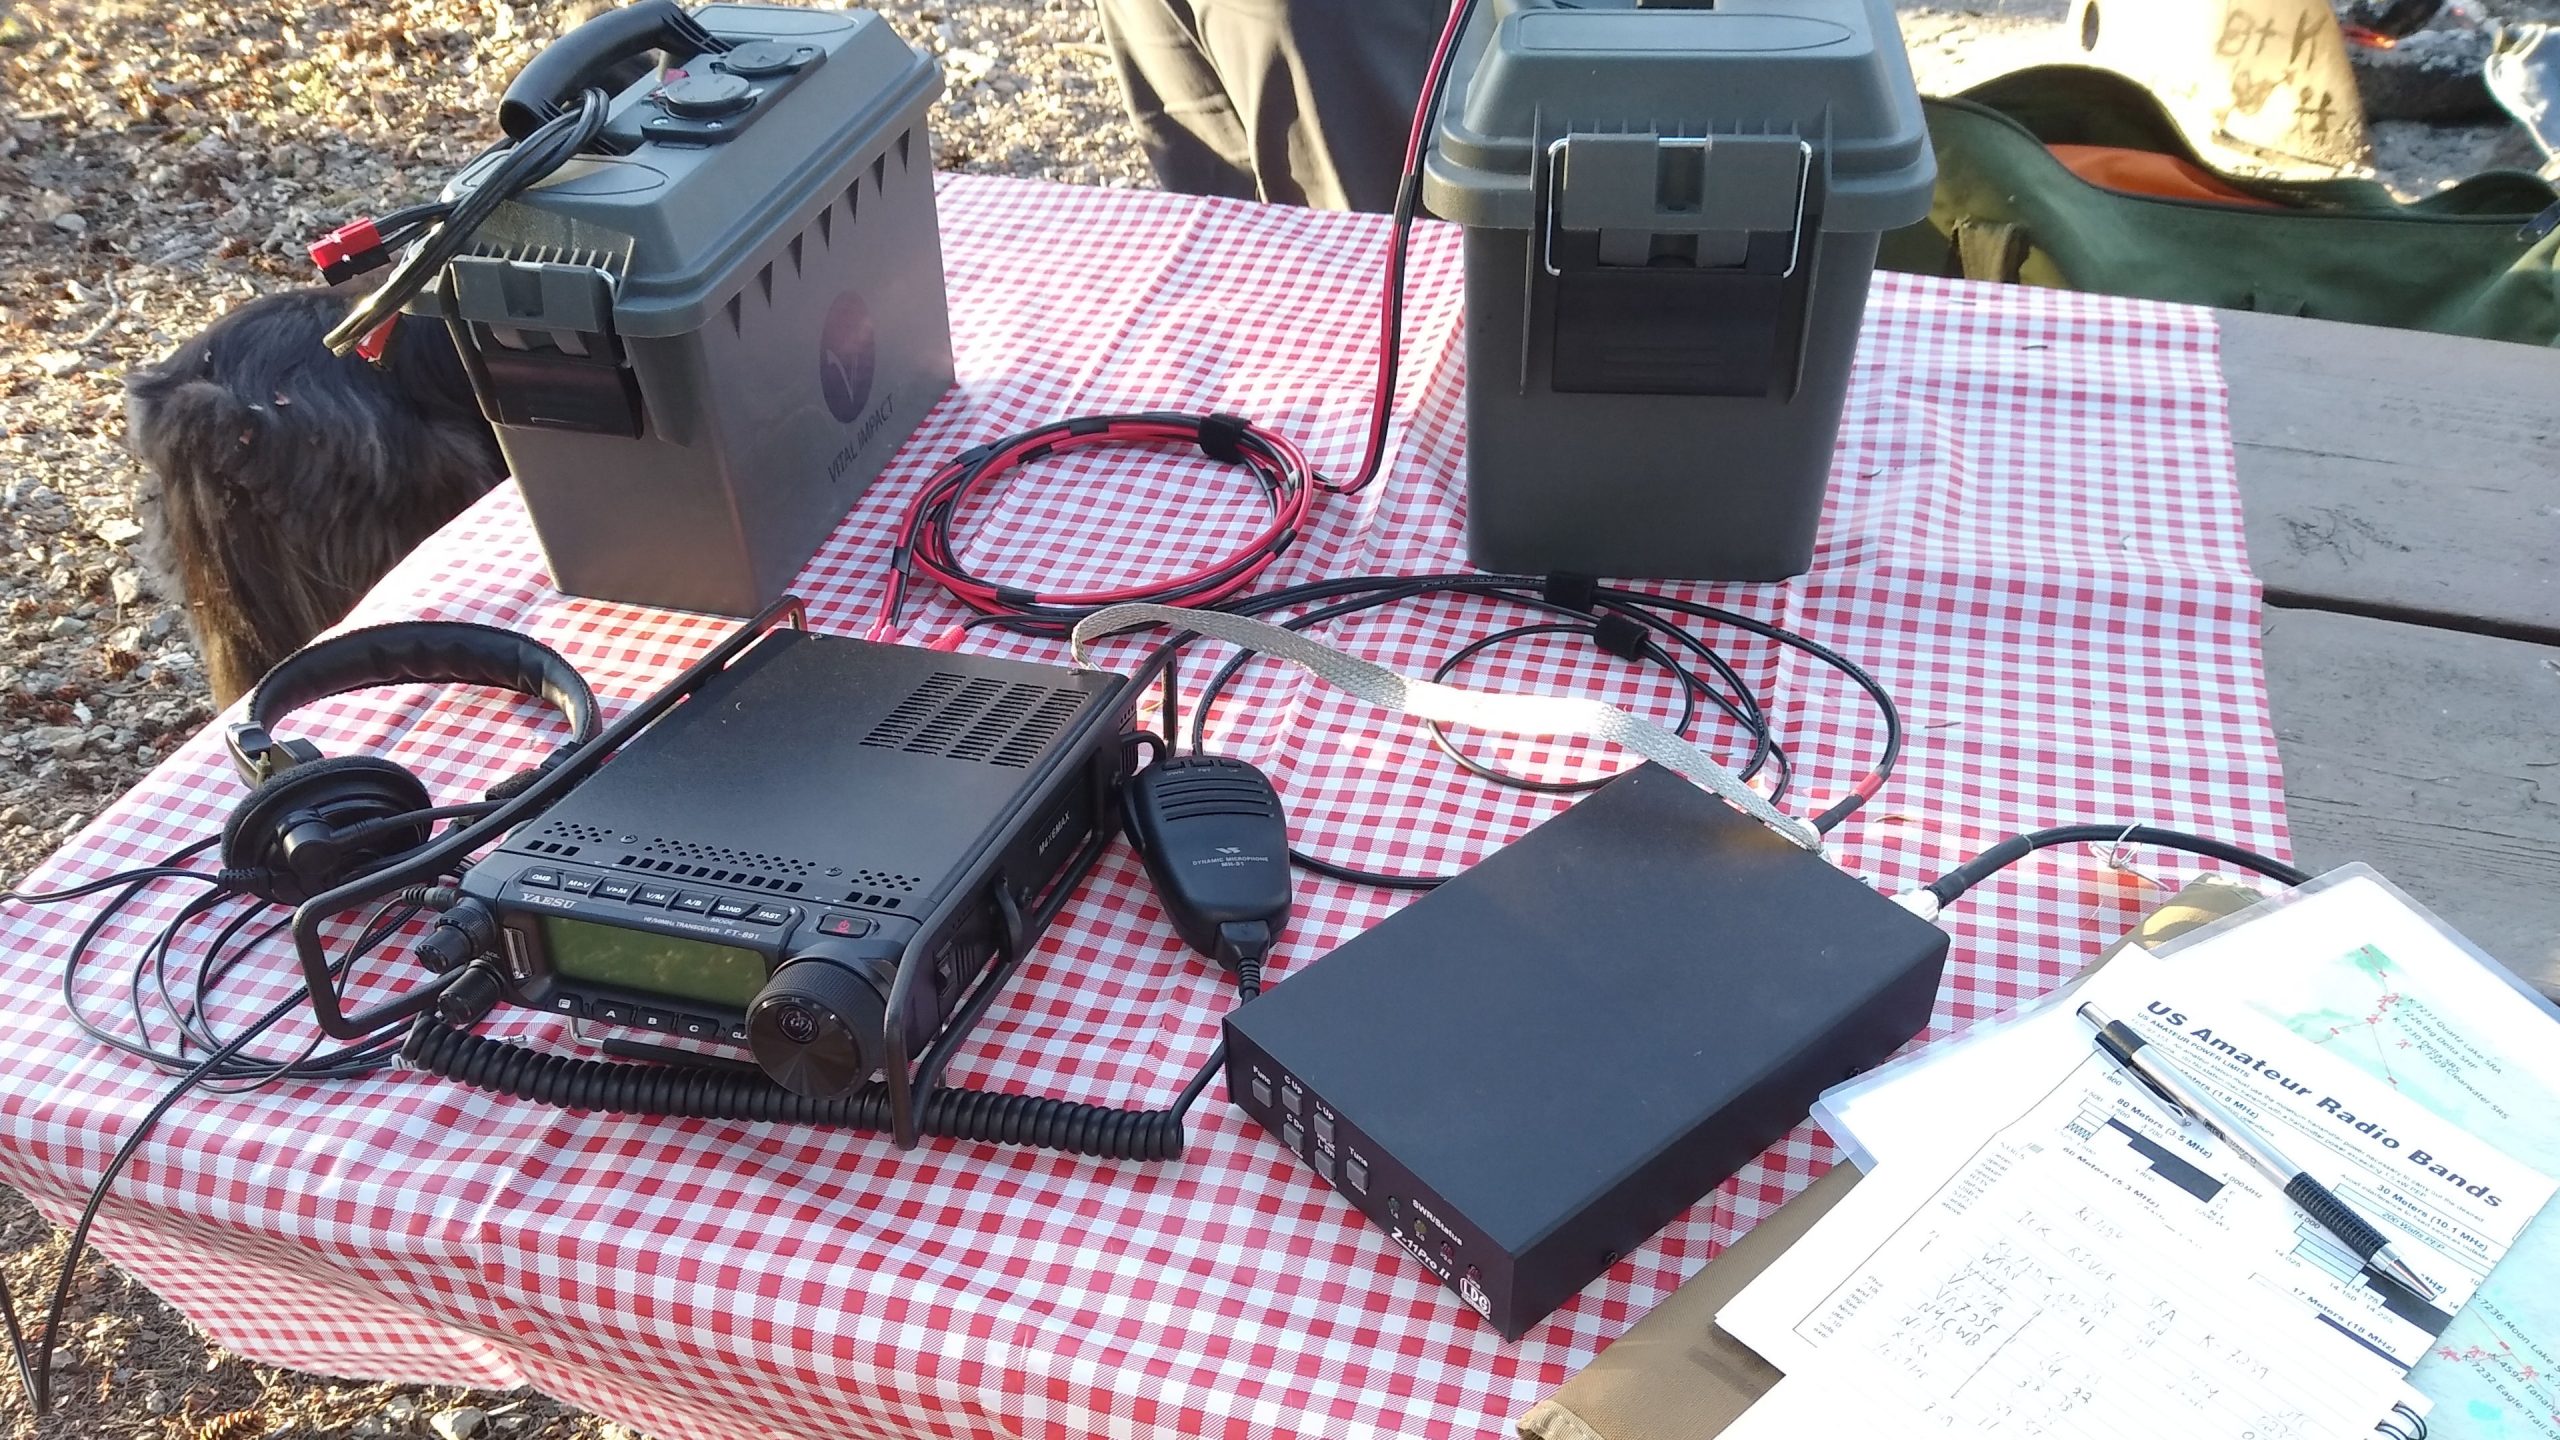
For the container I used plastic ammunition boxes I picked up at Cabela’s. I preferred the plastic boxes because the shell would be insulating. And since they were intended for carrying ammunition they were more than stout enough to hold the weight of the batteries.
Wiring
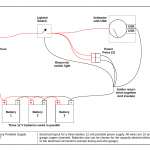
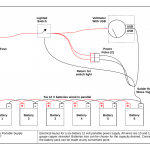
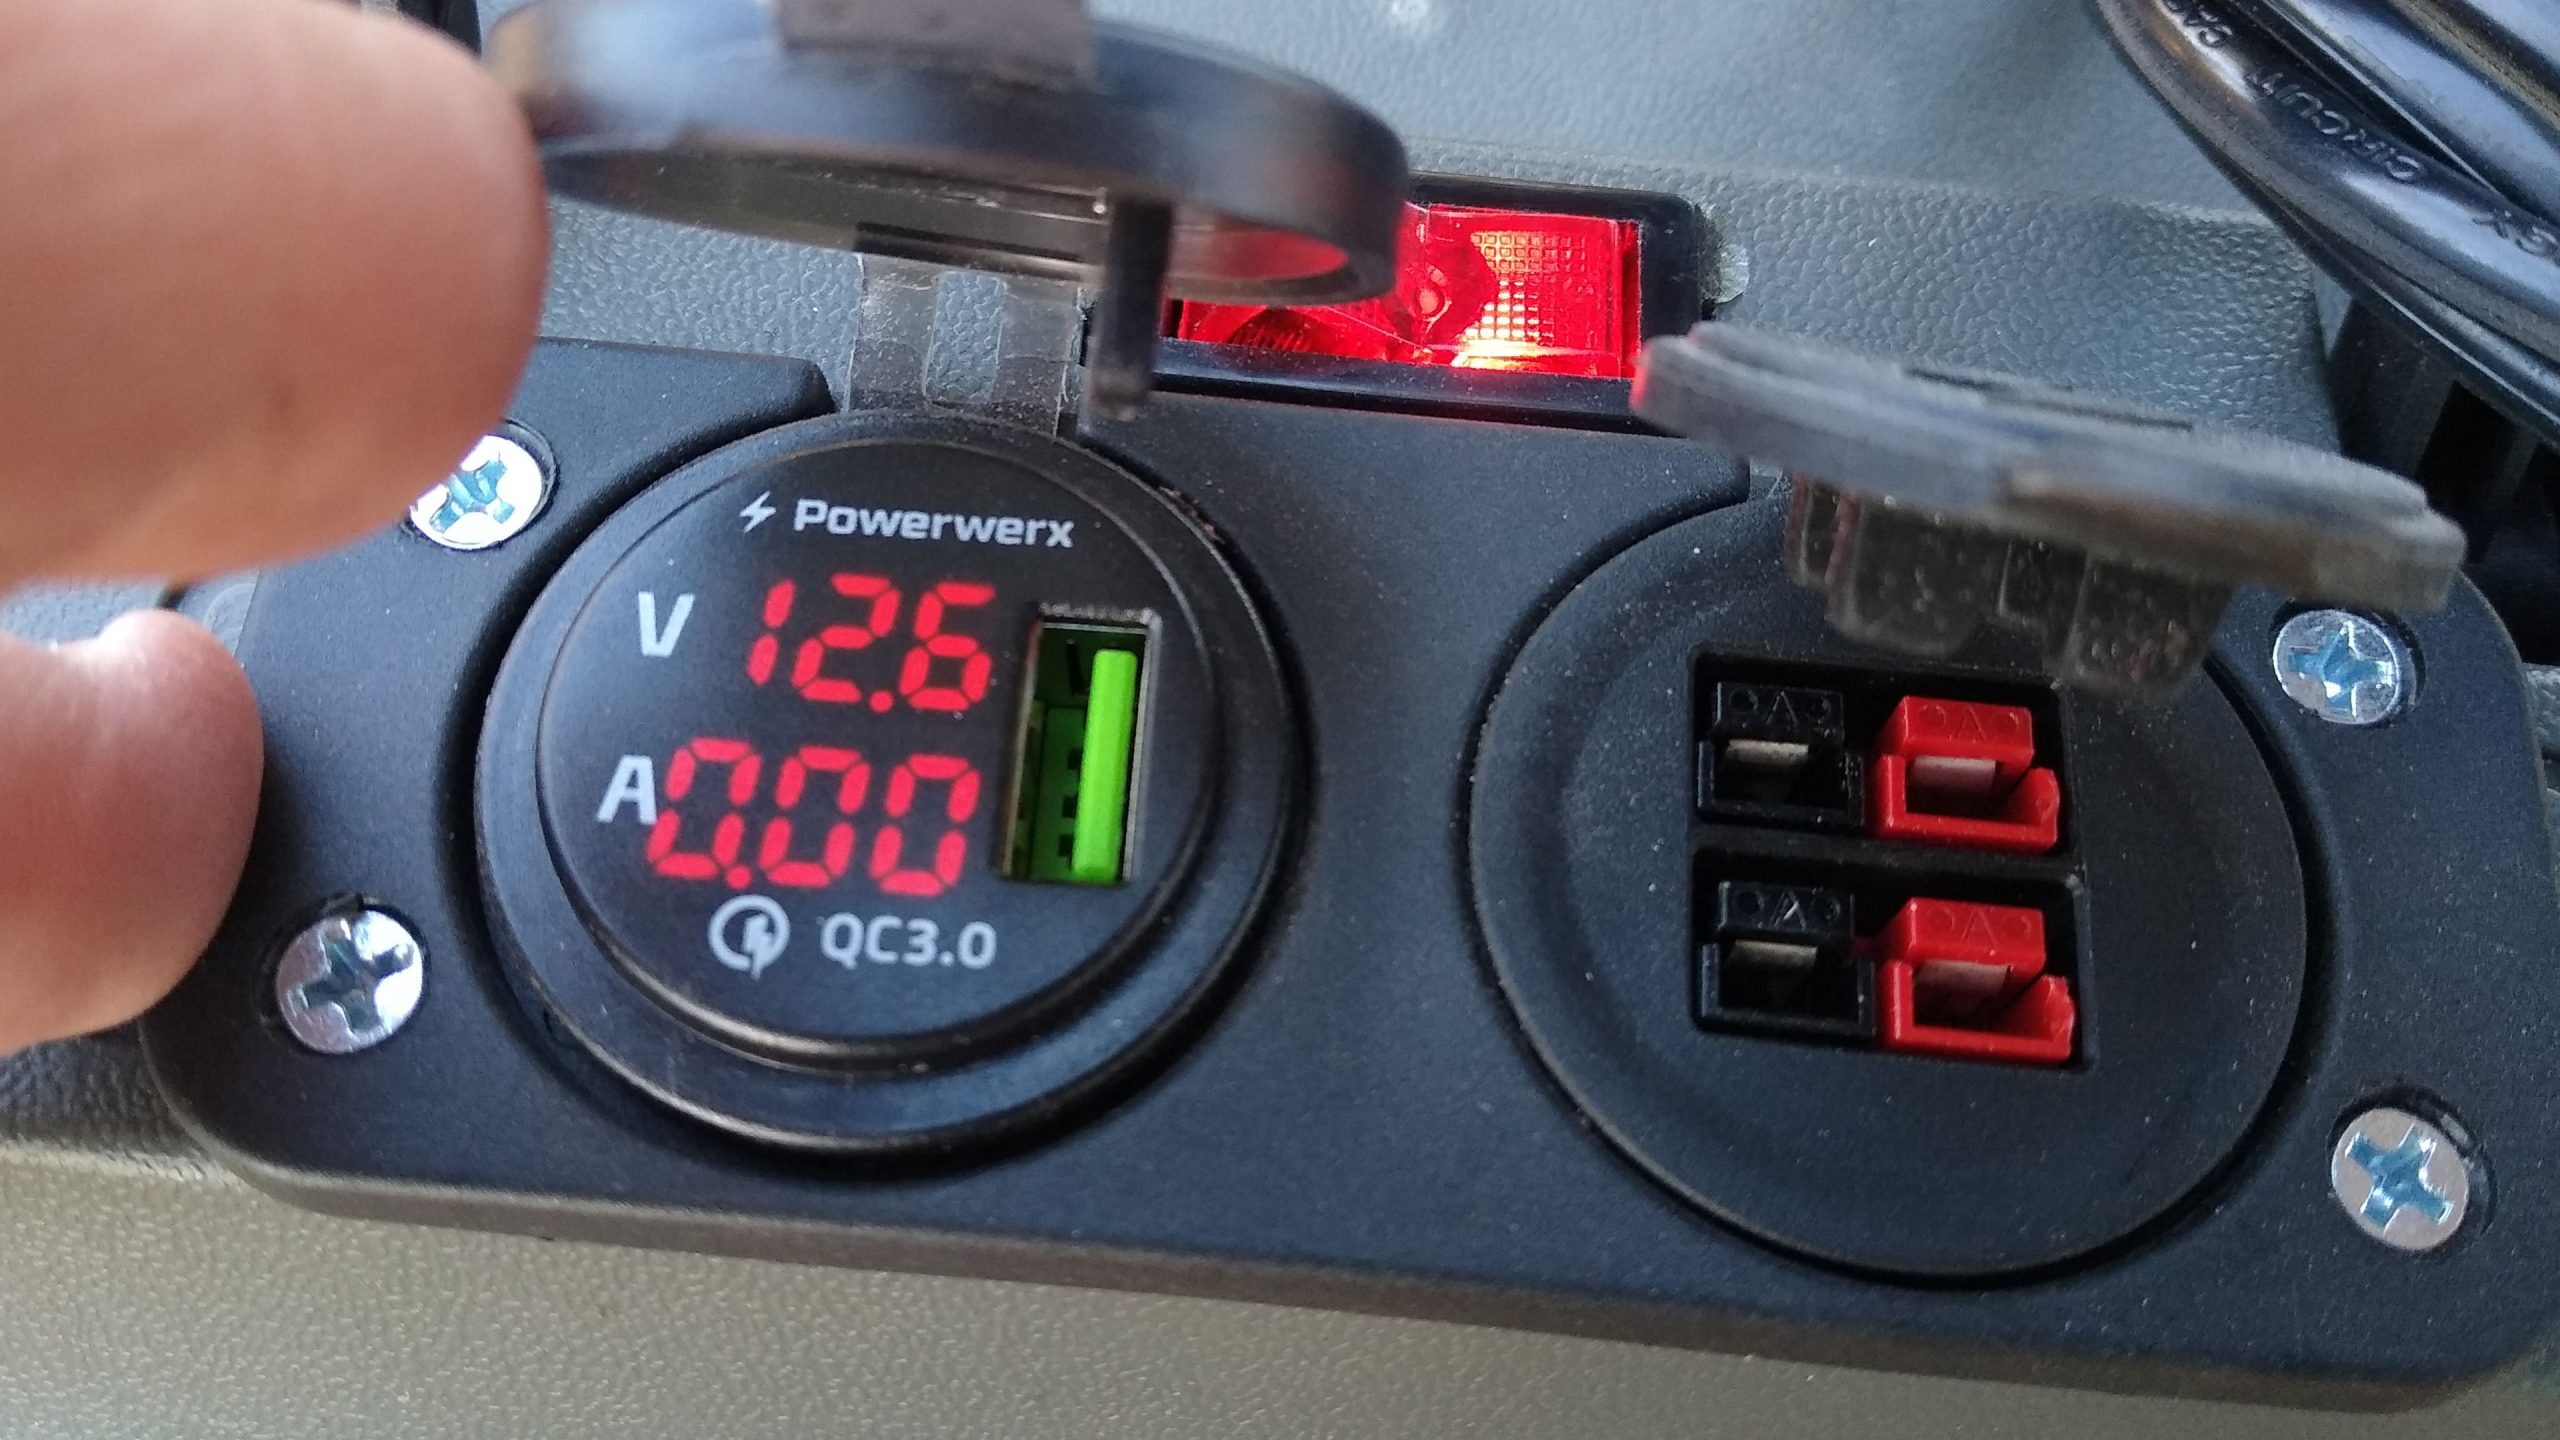
In the final electrical design I identified that I wanted fuse protection, at least two power pole connections, a shut-off switch, voltmeter, and USB charging. Both packs would use the same components and electrical layout; the only difference would be the number of batteries in each pack (wired in parallel).
The wiring diagrams are shown below. Click on each for a downloadable PDF.
Final product
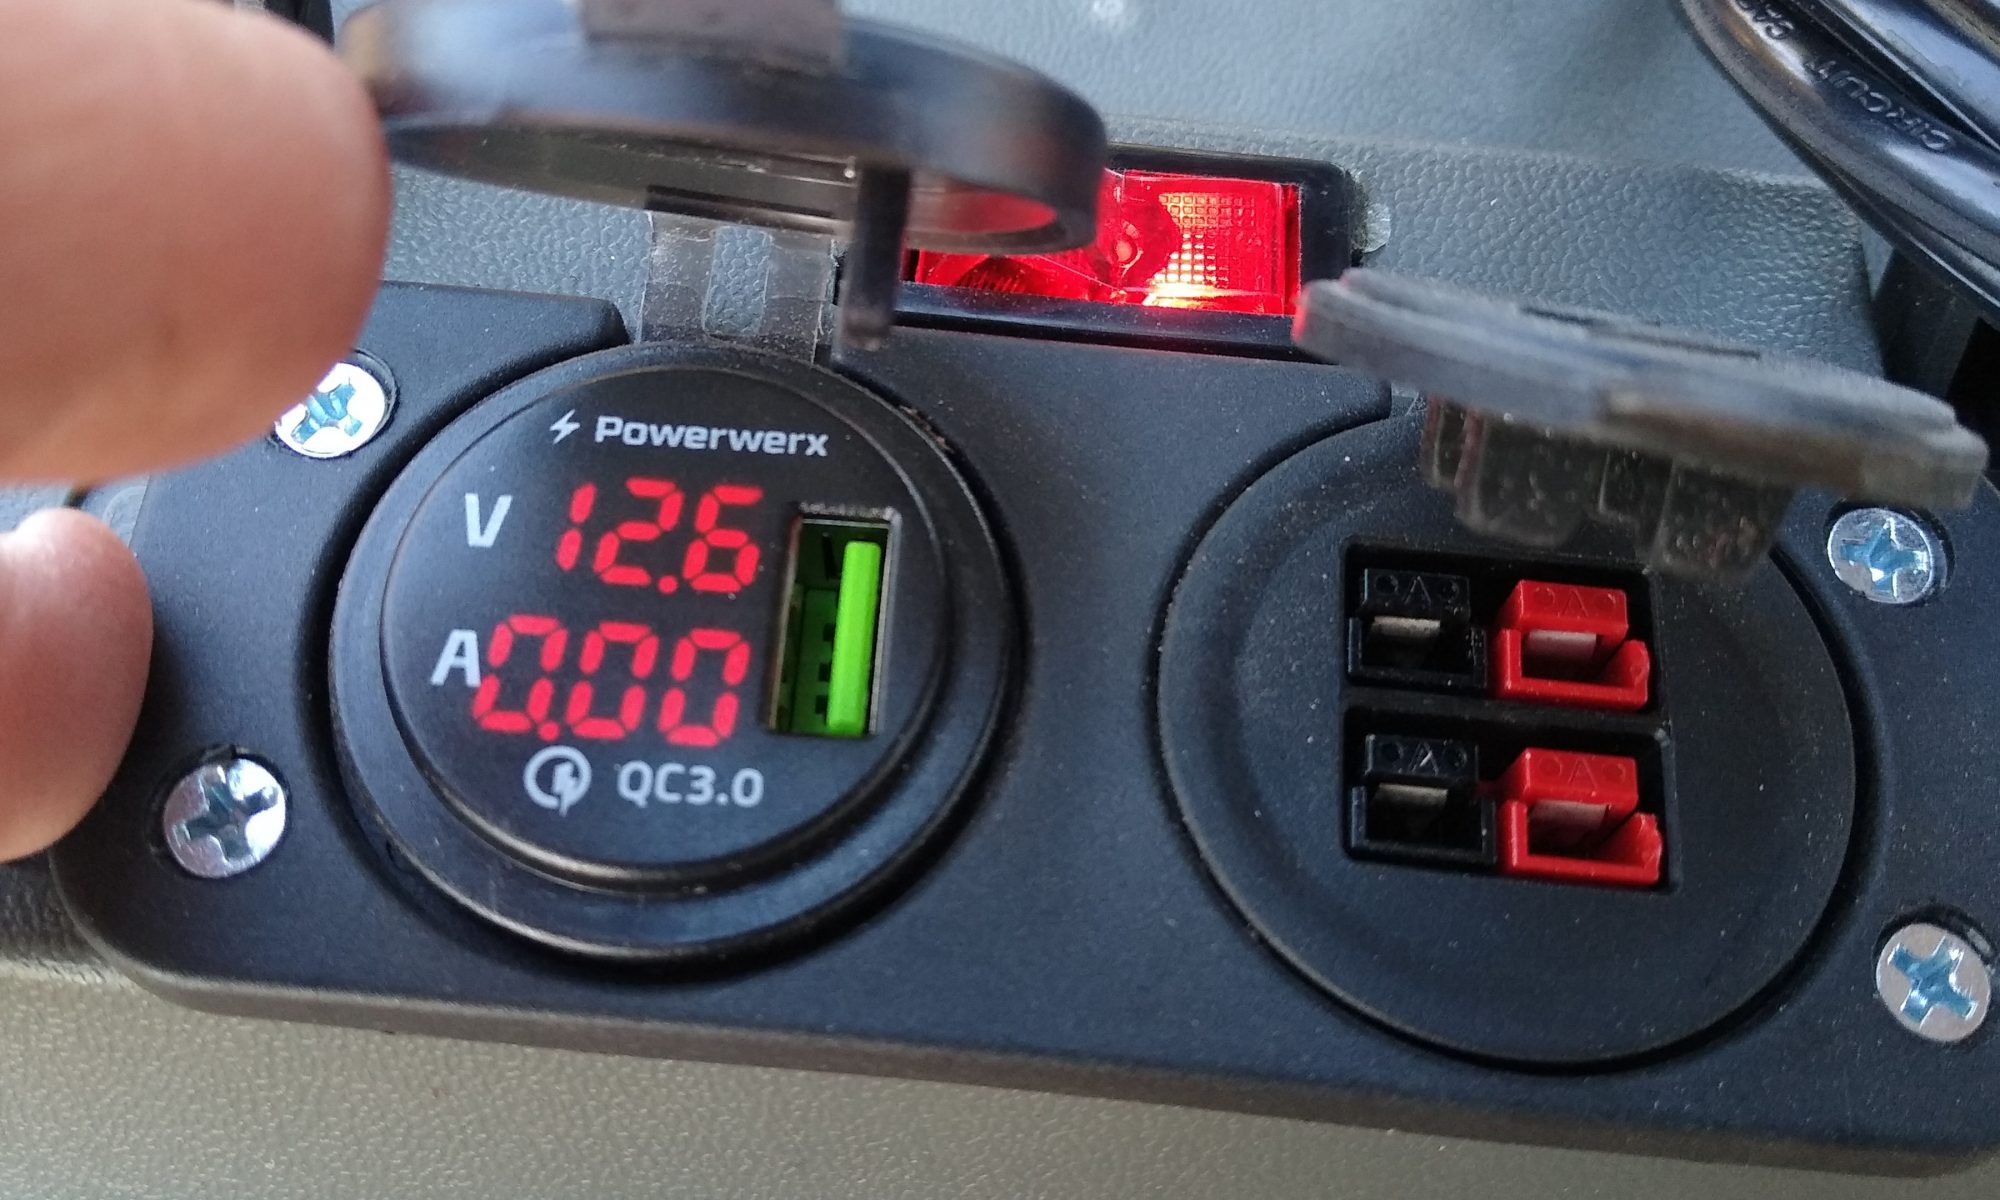
I rounded up the parts I needed: an automotive fuse holder, switch, and some pre-build power pole and voltmeter assemblies from powerwerx.
Assembly was pretty straightforward, involving little more than some wire and terminals from the local auto parts store. Since the batteries already fit the dimensions of the can I decided to forgo any hold-down mechanisms.
The only part of the constriction that gave me difficulty was with was wiring the batteries together. I tend to go overkill on wire sizes so as to avoid any unwanted voltage drop, and the 10 gauge wiring I used in the packs made for some tricky connections. There isn’t any chance of getting two ten gauge wires into a single spade terminal for connection to the battery.
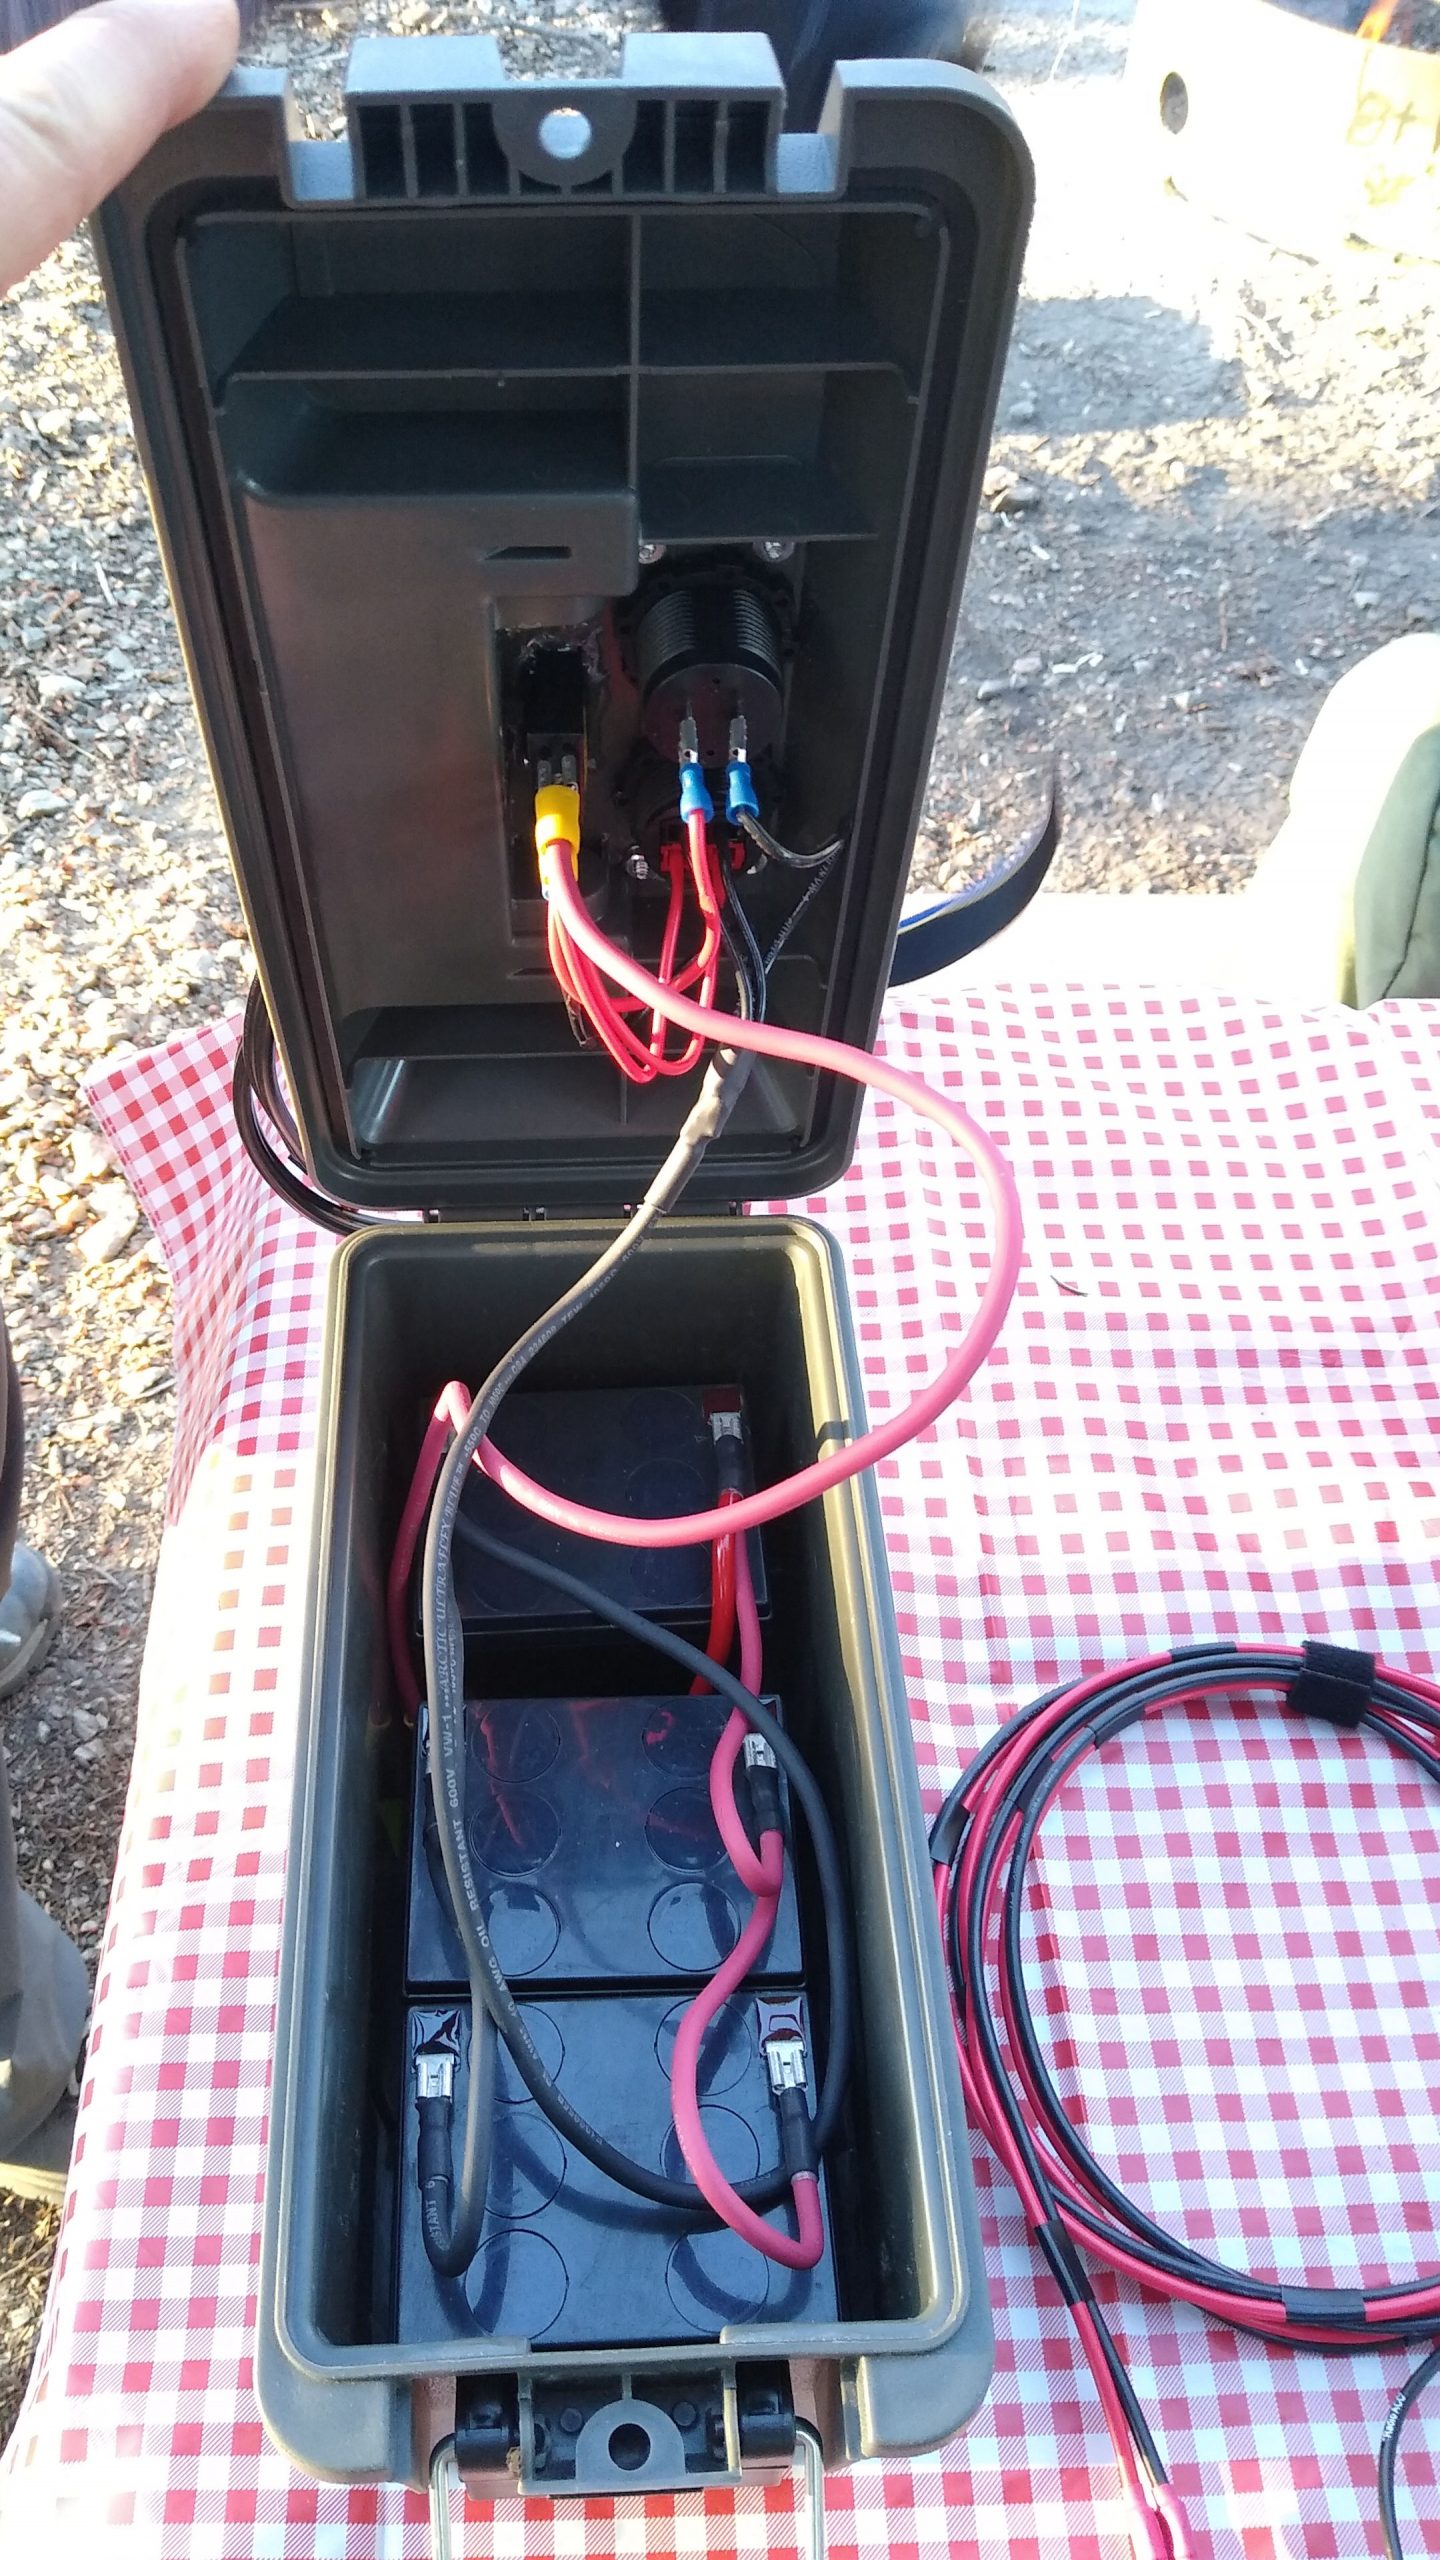
What I ended up doing was removing the insulating collar from the spade connectors and opening up the part where the wire goes. That part of the connector is just folded over and rolled, so with a pair of needle nose pliers you can open it up more to get a larger wire in. You can’t crimp the wires that way though, so I soldered all of the connections together where they connect to the battery terminals. It works.
Using the panel mount gauges and power pole connectors from Powerwerx was a good call. Powerwerx makes good products, and some components are better to buy pre-made than to cobble together from junk drawer parts.
When recharging at home I use an automotive trickle charger. The car charger has the right charging cycle for this battery chemistry (it doesn’t get any more standard than lead acid), and with the batteries wired in parallel they all charge as though they were a single, larger pack.
I have also field charged the packs using solar panels, and that also works great. The panels I use for camping have a raw DC output, which I feed into a charge controller. With the charge controller set for lead-acid chemistry the system works wonderfully.
I also intended for the packs to be rechargeable from a vehicle. I have tested that method, and it also works well. For vehicle charging I connect the pack to a battery isolator which I have mounted in the back of my truck.
Charging with either the solar panels or the truck is as easy as turning on the battery pack (to close the circuit) and connecting a power pole extension cord to both the charging source and the regular panel mount power pole connector on the top of the pack. Power out becomes power in!
Conclusions
In today’s ham radio world there are all kinds of ways to make great gear. But don’t let the prices of the latest and greatest gear keep you out of the hobby. Electrons are electrons, whether they come from a lead acid battery or a lithium cell. The advice I always give is to simply use what you’ve got! Make it work, have fun, and don’t overthink it.
Vehicle charging II
I mentioned above that you should always use an isolator when charging from a vehicle battery. The reason you shouldn’t connect directly (no isolator) is because you may get a pretty severe surge of power from the car battery into the battery pack when you do. The discharged pack will suck electrons from the car battery and probably overheat wiring, fry fuses, etc.
If you absolutely must charge a pack from your vehicle, without going through something like an isolator, then there is another way to do it safely:
- Start the vehicle.
- Disconnect the car battery.
- I repeat: disconnect the car battery.
- The vehicle will continue to run because the alternator is still being driven by the engine.
- Connect the positive and negative leads of the pack to the vehicle’s battery cables. (You are bypassing the car battery entirely)
- Allow the alternator to charge the pack while the engine runs, monitoring the system closely.
Depending on the output of your alternator you still may overheat the battery pack, but at least you won’t fry your starting battery. Keep an eye on the pack to make sure it isn’t getting overcharged.
Or, just do it the right way and use an isolator.
Updated 2022-05-14